I was working on my personal project – an audio amplifier and needed the LCD display functions, I had already described in my experiments the way to do so, but there were some flaws, so here we are again. What do we need?
- Display any info on LCD.
- Display the time.
- Display the temperature.
Let me tell the story: Initially, I’d bought a display produced by sunlike sc1602, and wasted tons of my time of debugging this piece of silicon. I think I tried all known init procedures I was able to find on the web and still did not see any sign of the life. After that I just bought another LCD from Winstar, and, surprise surprise it initialized immediately by the standard procedure, I was using in my first experiment about LCD.
The display is connected, but the old code has some flaws, that is how I changed lcd.h:
#include <htc.h>
#ifndef _LCD_H_
#define _LCD_H_

#ifndef _XTAL_FREQ
// Unless specified elsewhere, 4MHz system frequency is assumed
#define _XTAL_FREQ 4000000
#endif

#define LCD_RS RD2
#define LCD_EN RD3

#define lcd4b RD4
#define lcd5b RD5
#define lcd6b RD6
#define lcd7b RD7

#define    lcd_cursor(x)    lcd_write(((x)&0x7F)|0x80)
#define    LCD_STROBE()    ((LCD_EN = 1),(LCD_EN=0))
#define testbit(data,bitno) ((data>>bitno)&0x01)

extern void lcd_write(unsigned char c);
extern void lcd_clear(void);
extern void lcd_puts(const char * s);
extern void lcd_putch(char c);
extern void lcd_goto(unsigned char pos);
extern void lcd_init();

#endif
The main difference in this file – I did not use the whole port for the data as it was done in the previous experiment, only 4 lines were used so only pins are changing their state. So we also need to change two functions: lcd_write and lcd_init.
lcd.c
#include "lcd.h"

void
lcd_write(unsigned char c)
{
__delay_us(40);
if (testbit(c,4)) lcd4b = 1; else lcd4b = 0;
if (testbit(c,5)) lcd5b = 1; else lcd5b = 0;
if (testbit(c,6)) lcd6b = 1; else lcd6b = 0;
if (testbit(c,7)) lcd7b = 1; else lcd7b = 0;
LCD_STROBE();
if (testbit(c,0)) lcd4b = 1; else lcd4b = 0;
if (testbit(c,1)) lcd5b = 1; else lcd5b = 0;
if (testbit(c,2)) lcd6b = 1; else lcd6b = 0;
if (testbit(c,3)) lcd7b = 1; else lcd7b = 0;
LCD_STROBE();
}

void
lcd_clear(void)
{
LCD_RS = 0;
lcd_write(0x1);
__delay_ms(2);
}

void
lcd_puts(const char * s)
{
LCD_RS = 1;    // write characters
while(*s)
lcd_write(*s++);
}

void
lcd_putch(char c)
{
LCD_RS = 1;    // write characters
lcd_write( c );
}

void
lcd_goto(unsigned char pos)
{
LCD_RS = 0;
lcd_write(0x80+pos);
}

void
lcd_init()
{
LCD_RS = 0;
LCD_EN = 0;

__delay_ms(15);    // wait 15mSec after power applied,
lcd4b = 1;
lcd5b = 1;
lcd6b = 0;
lcd7b = 0;
LCD_STROBE();
__delay_ms(5);
LCD_STROBE();
__delay_us(200);
LCD_STROBE();
__delay_us(200);
lcd4b = 0;
lcd5b = 1;
lcd6b = 0;
lcd7b = 0;          // Four bit mode
LCD_STROBE();

lcd_write(0x28); // Set interface length
lcd_write(0xF); // Display On, Cursor On, Cursor Blink
lcd_clear();    // Clear screen
lcd_write(0x6); // Set entry Mode
}
Use the next code to check how if it works:
TRISD = 0x00;
lcd_init();
lcd_goto(0x00);
lcd_puts("LCD 16x2 test");
lcd_goto(0x40);
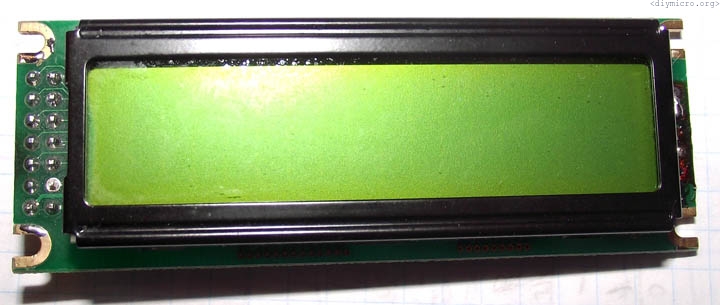
lcd_puts("Diymicro.ru");That how the success looks like 🙂 :

The time for bullets 2 and 3 has come.
At the moment I wasn’t aware that LCD can be treated like uart interface, by ASCII table, and if you want to send the number you can simply add 0x30 to your number. Instead I made it by predefined arrays here – if you wish to send the data using the minimum possible memory, so far I need just numbers:
const unsigned char digits[10] = {
0b00110000,            //0
0b00110001,            //1
0b00110010,            //2
0b00110011,            //3
0b00110100,            //4
0b00110101,            //5
0b00110110,            //6
0b00110111,            //7
0b00111000,            //8
0b00111001,            //9
};
Now, we are ready to write functions for periodic refreshing of the display:
void display_tt() {                                                 //дежурная функция отображения информации на LCD
unsigned char d;
get_temp();                                                         //берем значение температуры
LCD_RS = 0;
lcd_write(0b00001100);                                              //выключаем курсор
__delay_us(100);
lcd_clear();
d = ReadHour();
lcd_goto(0x05);
lcd_putch(digits[d/10]);                                            //выводим значение часов
d = d - ((d/10)*10);
lcd_putch(digits[d]);
d = 0b00111010;
lcd_putch(d);
d = ReadMin();
lcd_putch(digits[d/10]);                                            //выводим значение минут
d = d - ((d/10)*10);
lcd_putch(digits[d]);
lcd_goto(0x44);
if (!sign) lcd_putch(0b00101011); else lcd_putch(0b10110000);       //знак температуры
d=temperature/10;
lcd_putch(digits[d]);                                               //целое значение температуры
d=temperature-((temperature/10)*10);
lcd_putch(digits[d]);
d = 0b00101110;
lcd_putch(d);                                                       //точка
lcd_putch(digits[temp_drob]);                                       //вывод дробного значения
d = 0b11011111;
lcd_putch(d);                                                       //градус
d = 0b01000011;
lcd_putch(d);                                                       //С

}
in the middle of the debug process…

The next thing is to set up the refreshing rate, I used interrupts and TMR2, since I suspected that I might need other timers for different purposes in a future project. We don’t need to do this quite frequently, so I used all maximum values and even added an extra variable to obtain the refreshing rate of about 32s:
interrupt isr() {

if (TMR2IF) {
update++;

if (update == 255) {
flag++;
update = 0;
}

TMR2 = 0x01;
T2CKPS0 = 1; T2CKPS1 = 1; //1 делитель не делит входную частоту
TOUTPS2 = 1; TOUTPS1 = 1; TOUTPS3 = 1; TOUTPS0 = 1; //2 делитель делит на 5

TMR2IF = 0;  //сброс флага
}

}
Don’t forget that for variables used inside of the interrupt routine the volatile word should be added in the declaration section.
Pingback: Humidity control for the bathroom | diymicro.org